Want to play PC VR content on your Oculus Quest or Meta Quest 2? Here’s everything you need and how to do it.
This guide was first published in October 2020, but has been updated and republished several times since then — most recently May 2022 — to ensure all information remains correct and up-to-date.
The Meta Quest 2 (formerly known as Oculus Quest 2) is a fantastic standalone headset from Meta (formerly Facebook). There’s heaps of native content available on the Oculus Store, but one of the key features of the Quest and Quest 2 is their ability to also play PC VR content as well, while connected to a VR-ready PC — wired and wirelessly.
First and foremost, there’s Meta’s official wired method called Oculus Link, which uses a USB cable. However, there’s also more advanced wireless options — Meta’s official wireless option, Air Link, and a third-party app, Virtual Desktop.
We’ve outlined what you need and included instructions for setup of all three methods below, focusing primarily on Oculus Link.
For wireless options, we’ve written up a quick how-to summary on each and then linked to our other, more detailed guides for those methods, if you need them.

VR-Ready PC
In addition to your Quest headset, you’ll also need a VR-ready PC.
Take a look at Meta’s Oculus Link compatibility page to see if your computers meet the minimum requirements for Oculus Link. Also check that all your hardware is compatible — not everything is compatible with Link yet (but it’s getting better).
The specification requirements will change depending on the game as well — some PC VR games require beefier specs than others — so be sure to check game requirements too.
Cables
For Oculus Link, you’ll need a USB-C cable to connect your Quest to your computer. The benefit of using a wired connection is reliability. The wireless connections — Air Link and Virtual Desktop — can be less reliable, depending on your conditions.
Depending on what cables you have on hand, you may not need to purchase a new cable to use with Link. Any USB-C cable that meets at least USB 2.0 specification should work, but USB 3 and above is preferable. The cable should be at least 3 meters minimum, ideally 5 if you want a maximum range of movement.
The original Oculus Quest included a long Link-compatible USB C to C cable in the box. The Quest 2, however, does not come with a cable that is an appropriate length for Link — you’ll need to buy one.
Depending on cable, you may also need to buy an adapter to plug it into your computer. Most Link-compatible cables are USB C on both ends, but not all PCs have USB-C ports. You can buy a USB-C to A adapter if so, but you’ll need to make sure it’s also at least USB 2.0 (or matching the specification of the cable, if higher than USB 2.0, for best performance).
Regardless of what cable and adapters you use, make sure they’re from reliable brands — we’ve found Oculus Link can act a bit funny when you’re using less reliable equipment.
We’ve got an entire guide on building an Oculus Link cable, so read that if you’re still unsure.
Software
Download the official Oculus PC app, which will run Oculus Link (and Air Link) and allow you to play PC VR games on your headset. You can get it here, listed as a download for Air Link and Link Cable.
Oculus Link also works with SteamVR, so make sure to download Steam and install SteamVR if you want to play any of that content.

Oculus Link Setup
Before using Oculus Link, you’ll need to perform a first-time setup.
Make sure your Quest is turned on and connected to your computer with your USB cable. From there, open the PC Oculus app and press ‘Add a New Headset’ and select either the original Oculus Quest or Quest 2. The app will then run you through an easy first-time setup process.
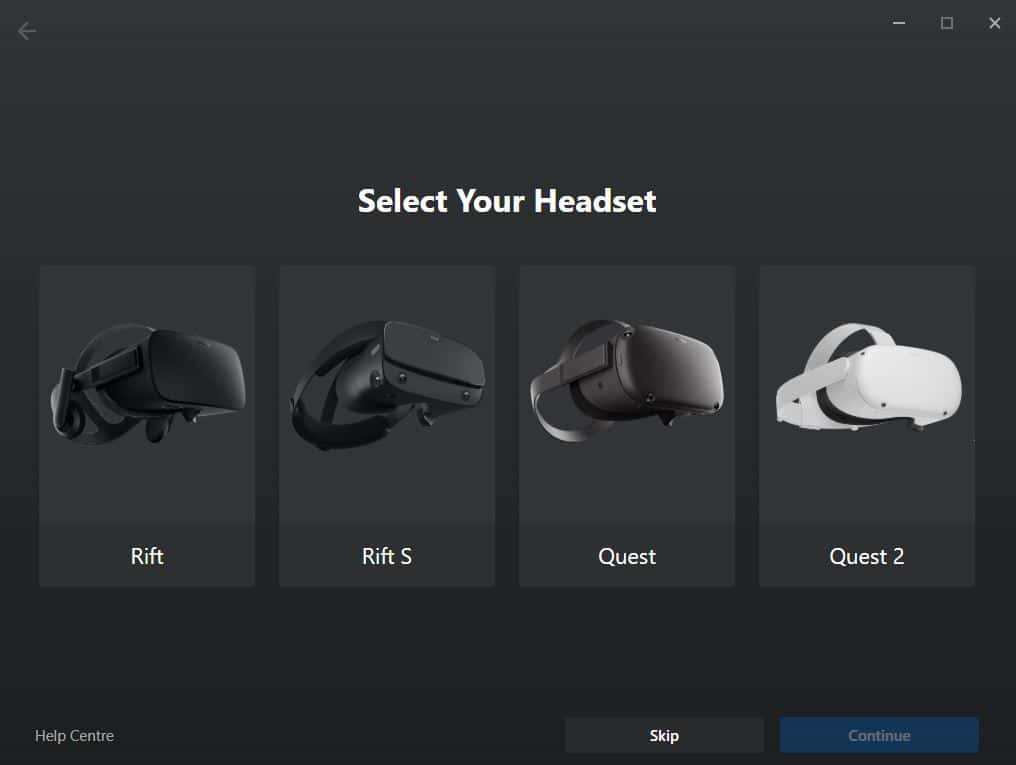
After you’ve set up Oculus Link, it will be available to use whenever you plug your headset into the PC — a prompt should appear in VR asking if you want to enable Link.
From there, you can launch any Oculus games directly or start up SteamVR on your PC to jump into other experiences. You’re good to go!
Adjusting Oculus Link Refresh Rate on Quest 2
When using a Quest 2, you can adjust Link’s refresh rate to run at higher rates than the default 72Hz. The original Quest is limited to just 72Hz, so the following steps won’t apply.
Once you’ve got Link up and running, you can tweak its refresh rate to run at either 72Hz (the default, recommended option), 80Hz, 90Hz or 120Hz. To do this, connect your Quest 2 to your PC and go to the Devices tab in the Oculus PC app.
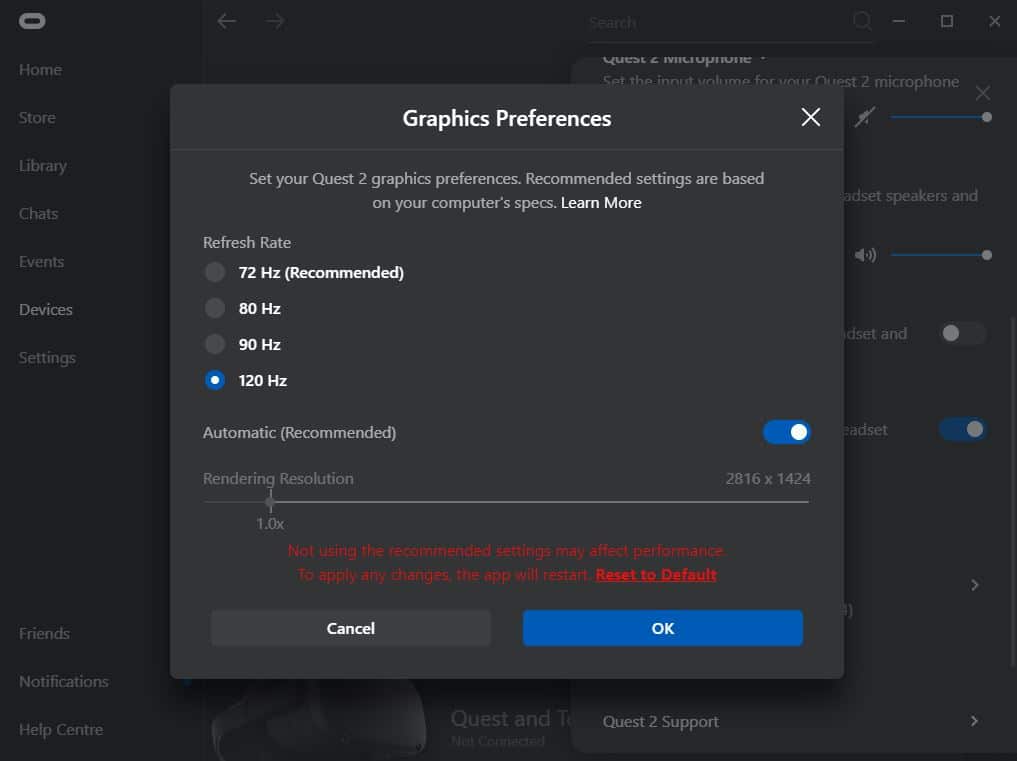
If you click on the active Quest 2 headset, a settings sidebar will be brought up.
Click on Graphics Preferences to adjust the refresh rate and rendering resolution, as pictured above. Setting these options too high will impact performance — it depends on your PC hardware and potentially what game you’re playing, so test and adjust accordingly.
This method works for setting Air Link’s refresh rate and rendering resolution as well — your preferences should be carried over.

Air Link Setup
Note: The Windows 11 update earlier this year brought with it some performances issues for those using Air Link. We strongly recommend not using Windows 11 if you’re looking to play PC VR content on Meta Quest 2 until the issue is resolved.
The official method for playing PC VR content wirelessly on Quest is Meta’s Air Link software, available in beta in the Oculus PC app. It was originally only available for Quest 2, but was later expanded to the original Quest in the v30 software update.
Keep in mind that Air Link won’t necessarily work for everyone — depending on your personal setup and your network hardware, performance and reliability may be unstable or vary.
Here’s a short summary of the setup process (for more detail, see here):
First of all, you’ll need an AC or AX router with a 5Ghz network for good performance, with your PC connected via Ethernet. Meta warns that mesh wifi networks or computers connected wirelessly are known to cause performance problems.
Ensure you have the Oculus app open on your computer. Then, go to the settings menu on your Quest and go to the Experimental tab. Here, you can enable Air Link and pair your headset with your desktop PC running the Oculus software.
After that, you’ll be able to start Air Link in the Quick Actions menu of your Quest — just select your PC, connect, and you’re good to go.
If you’re having trouble or need greater explanation, we have a separate guide with more detail on setting up and using Air Link here.

Virtual Desktop Setup
An alternative to Air Link is the third-party app Virtual Desktop, which allows you to bring your computer’s display into VR and interact with it from within your headset. However, it also has similar functionality to Air Link, allowing you to stream PC VR content wirelessly to your Quest.
The app has quite the history and was actually available long before Air Link — some users find the former works better than the latter, or vice versa. Virtual Desktop is available for both Quest and Quest 2 (but performance may not be quite as good on the former).
Virtual Desktop’s performance will really depend on your individual setup and internal network. If you’re having trouble with Air Link, Virtual Desktop may be an alternative to try instead. That being said, you might still encounter unreliable or varying performance depending on your setup. It’s really hard to say.
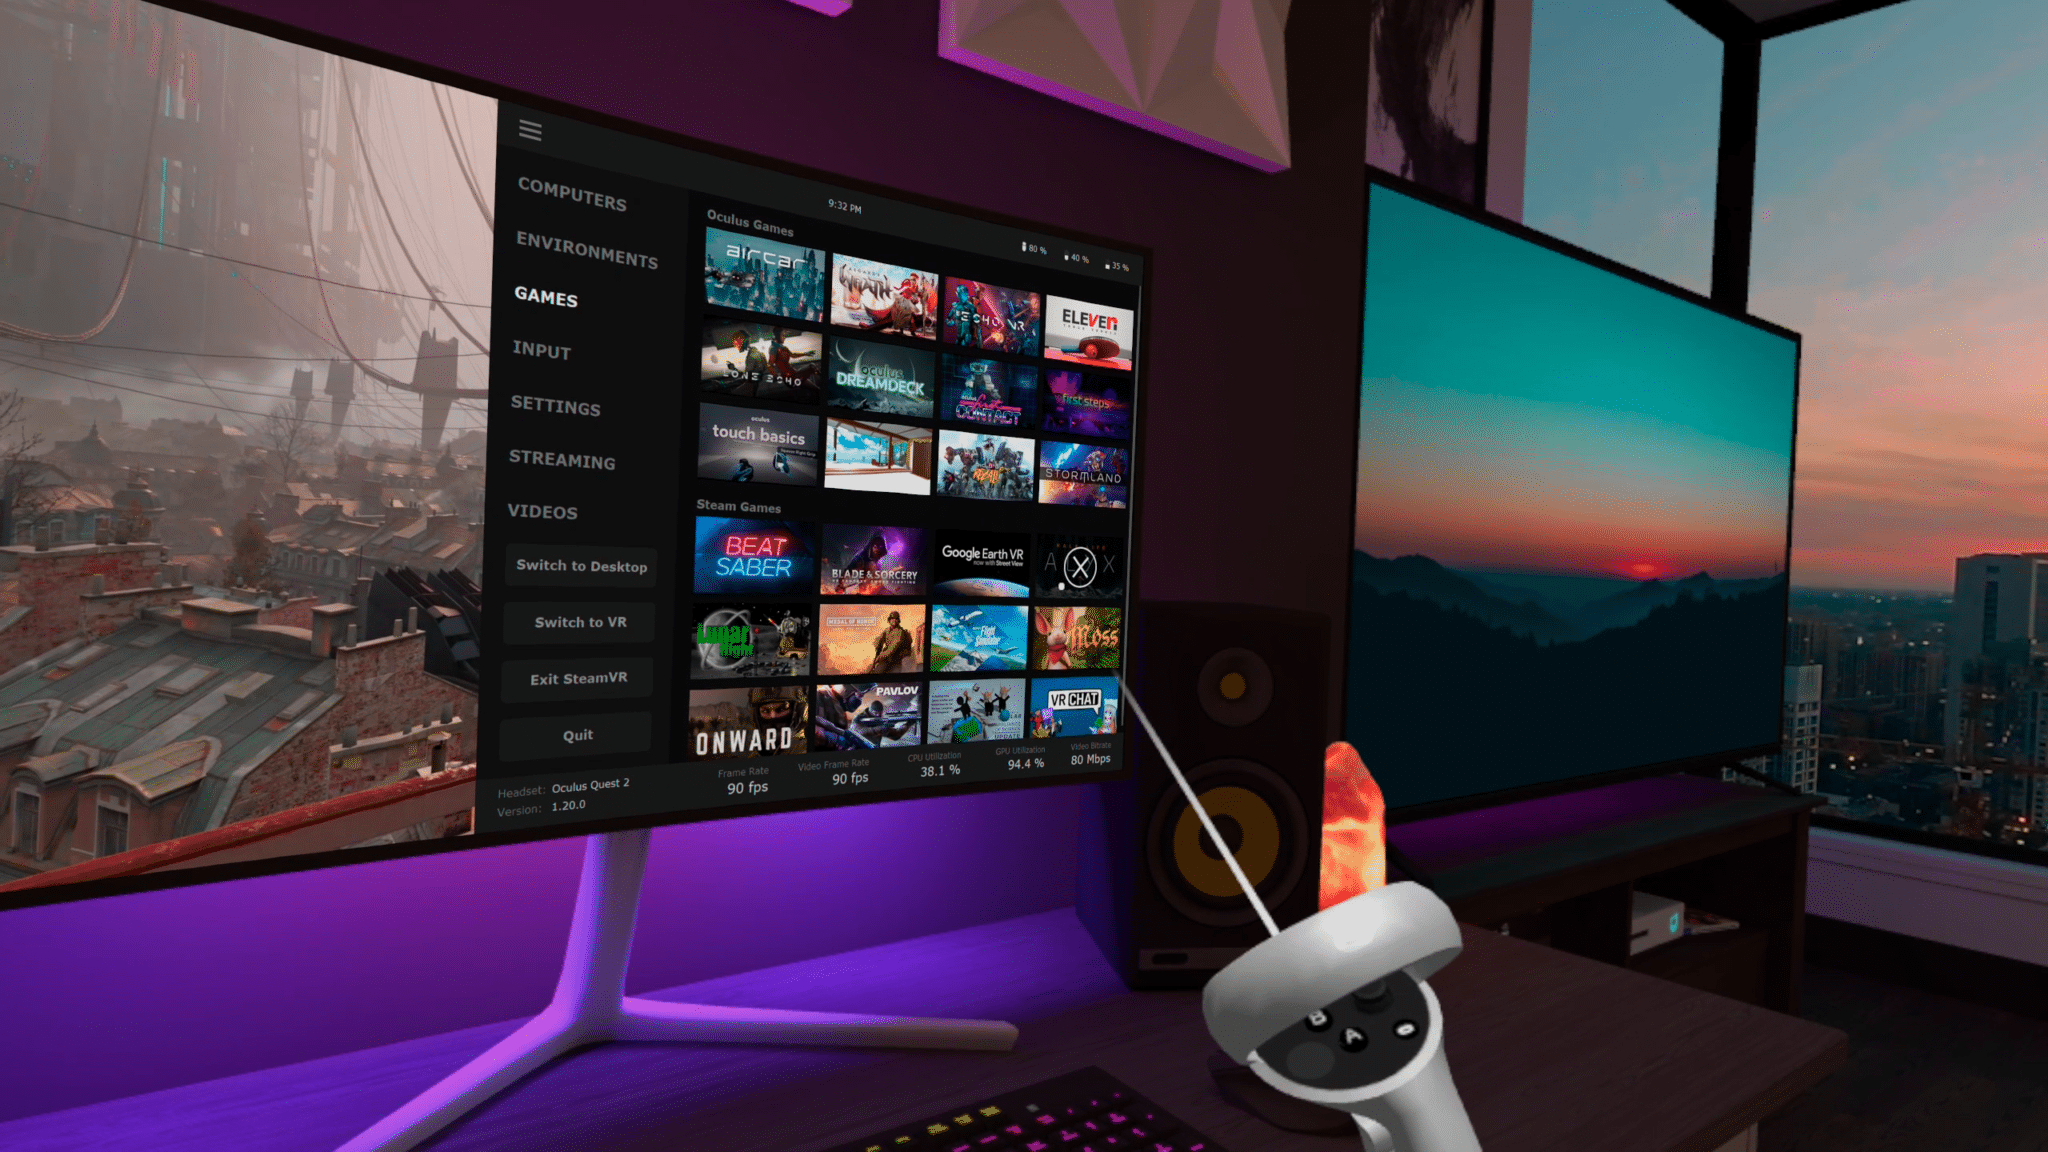
Just like Air Link, you’ll need a ‘reliable’ router with a 5Ghz network and a computer connected via Ethernet. You’ll also need to install the Virtual Desktop streamer app for PC and purchase a copy of Virtual Desktop for Quest.
Once you have those downloaded, just make sure the streamer app is running on your computer and open up Virtual Desktop on Quest to connect. Once connected to your computer, you can launch your PC VR content and adjust the streaming settings in Virtual Desktop’s menus to optimize performance. You can also use Virtual Desktop’s ‘Games’ tab (pictured above) to start playing.
If you’re having trouble and need a more detailed explanation, we have a separate, longer guide on how to stream PC VR content using Virtual Desktop here.
So those are your options for playing PC VR content on the Oculus Quest and Meta Quest 2. Got any questions? Leave them in the comments below.

