As high-end VR headsets amass more and more killer applications, enthusiasts on a budget have been sitting on the sidelines, waiting for a more affordable solution. Google Cardboard is cost-effective, but it’s limited by what the phone itself is capable of rendering.
Luckily, there’s a solution that won’t break the bank: streaming you PC output to a Google Cardboard-compatible Android application. It’s not perfect, but it is elegant and scalable.
Requirements
You’ll still need a powerful computer with a modern GPU to get VR applications running, but since this is a budget guide, it won’t hurt to test it with your current rig. There are several small performance advantages to this set up too; for instance, Android is limited to 60 FPS which makes streaming the usual 90 FPS benchmark for Oculus and Vive overkill. If you can prevent your PC from rendering the extra frames, do so.
You’ll also want a modern Android phone with an HD screen, gyroscope and Android 5.0 or above. For best results, it should also support USB tethering for optimal streaming performance. While iPhone supports Google Cardboard, it won’t work since these streaming applications aren’t available for it.
Visor

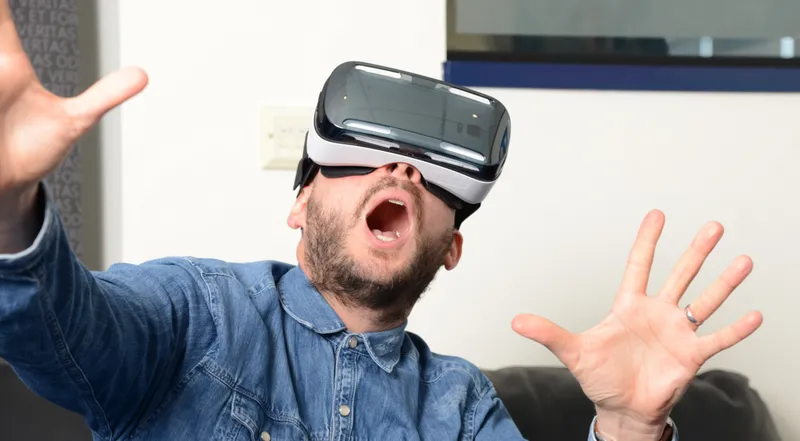
For a proper PC VR experience, you’ll want to sidestep official Google Cardboard visors in order to get one with a head strap.
My visor is usually called Fiit VR, but the same model goes by a lot of different brand names.
Phones from 4-to-6 inches should fit inside, but remember that bigger phones will fill out the visor’s 102 degree FOV better, and screens with more pixels will give you more detail.
You can find the Fiit VR for around $25 on Amazon, but if you look around you might be able to beat that and get a free Bluetooth controller as well.
Set-up
The first step is to enable USB tethering on your Android phone. Tethering is enabled by turning on a switch in Android’s network settings while the phone is plugged into your PC. Note that you don’t need to turn on your cellular data for the streaming applications to see your phone.
You might have an issue with this if your cellular data plan doesn’t allow tethering. There are workarounds if you’re savvy enough to poke through your phone’s internals, otherwise you’ll want to stick to Wi-Fi streaming.
VRidge
VRidge is the best place to start if you want access to new games. It’s a free Android application which can stream SteamVR applications as well as pre-release Oculus applications from a PC to your phone while reporting back head-tracking input to the PC. It runs inside RiftCat, the developer’s platform for VR experiences.
To get started, join the VRidge beta by making a RiftCat account and install the client software. Then, download the VRidge app on Google Play.

Boot up the VRidge application on your phone and it should start looking for the desktop client.
Next, boot up RiftCat on your PC and log in to get to VRidge. Then, VRidge will prompt you to pick a connection to your phone. If you’re tethered, this connection should show up as an ethernet connection over USB. If you’re connecting over Wi-Fi, pick Wi-Fi at the desktop client prompt and your phone should connect automatically if they’re on the same network.
Once you’re connected, check your streaming settings by clicking the button at the bottom of the VRidge client. There you can tweak bitrate, streaming resolution and framerate. If your PC has a GeForce GPU, enabling NVENC should boost stream quality. While there’s an NVENC equivalent for Radeon cards, the VRidge developers aren’t working on it yet.
If you haven’t calibrated your visor for Google Cardboard with a QR code yet, once you’re in a VRidge application you can tap the phone screen to bring up a small menu that will let you do so. Unfortunately, Fiit VR doesn’t have an official QR code to scan, but you can find some unofficial ones with a little help from Google.
The RiftCat store built into the client has free demos which are quickly accessible and good for working out kinks in your setup. These are all self-published applications built on old versions of the Oculus SDK, specifically version 0.8 and older.
VRidge will also run older Oculus applications found outside of the RiftCat store if you can point it to an executable with the Play VR Game from HDD button that shows up after you’re connected.
Unfortunately, VRidge doesn’t support newer Oculus-exclusive applications because of Oculus’ legal barriers against emulation, which were established for newer versions of its software.
VRidge has been updating with new features and/or bugfixes every Thursday and has had beta releases too, so it’s possible that more budget-friendly features will get added in the future. Update notes can be found on the RiftCat dev team blog.
Steam VR
To play most new VR games, you’re going to need Steam VR. VRidge support for SteamVR is new and hence buggy, but it’s been improving every week.
First, download and install the Steam VR software on Steam, then close Steam out.
After that, connect your phone to VRidge. Once you’re connected, hit the button at the bottom of the VRidge PC application window to get the program working with Steam VR . In the window that pops up, make sure the file locator is pointed at vrpathreg.exe and then click Register VRidge Drivers.
If you boot up Steam VR now, it should detect your phone as a viable headset. It’ll prompt you through a setup and offer a VR tutorial if you need it. After that, you’ll have access to Steam’s entire VR library, though you’ll be limited to games that don’t require motion controllers or positional tracking unless you can rig up an alternate solution.
Trinus VR
In cases where VRidge won’t work, like Open Source VR applications, Trinus VR is a $10 solution which will stream nearly anything to an Android phone and send motion tracking info to the PC in a few different formats.
To get started with Trinus, grab the free trial TrinusVR app on Google Play as well as the Trinus VR server for Windows from the Trinus website. Once you have both of them running, whether you’re using a tethered connection or Wi-Fi, tap the triangle on the Android application and then the triangle in the PC application. If you’ve connected, your phone should start to display whatever application you have active on your PC.

Trinus requires more tweaking than VRidge, starting with the Fake3D function. When this is enabled, as Trinus streams to your phone, it will create two copies of what you’re looking at so it can be viewed inside your visor. Turn this off if you’re using an application that has true side-by-side 3D output since it will double it unnecessarily.
Then, you’ll want to pick your lens correction since Trinus doesn’t automatically use your Google Cardboard lens settings. Pick Cardboard if you’re using the Fiit VR. Adjust the size to match your phone. You can adjust this manually if things still look distorted by clicking the Adjust button.
Next, check the video mode. Fast mode works with most applications, as long as they are in windowed mode. Adjust compression and quality as your connection demands. If the application has to be in full screen, the efficient Moonlight option will work if you have an Nvidia GPU. However, it requires installing the Moonlight application on your Android phone and connecting to the computer’s IP manually. Trinus’ lens correction also won’t be activated when Moonlight is used, making it a last resort in case you can’t run the application in windowed mode.
Finally, check your tracking settings. Mouse is default, meaning when you move your head, the computer mouse will make a corresponding movement. This is useful in applications that aren’t natively VR, since mouse movement will usually move the camera.
3D
A big draw for Trinus is running applications in side-by-side 3D with head tracking support.
TriDef 3D can run most new applications in 3D, but it’s $40. For best results you’ll need to install a registry key so it works in windowed mode for Trinus.
A free alternative is Virieo Perception, which recently began supporting DirectX11 with Fallout 4 and has head tracking built into Trinus.
Do a search before you try either of these programs to make sure the application you want to use in 3D is supported.
Enjoy!
Between VRidge and Trinus, most VR experiences are now available to you with some fiddling. The fidelity won’t match top-of-the-line headsets, but if you’re waiting on one and can get this setup together, the experiment should leave you pleasantly surprised, even coming back regularly.
Article contributed by Brandon Merriman. Brandon is a freelance writer with work appearing in publications such as The Lantern and The Artifice. You can follow him on Twitter: @Handoniumumumum


